Homemade beeswax candles
If you love simple DIY projects, homemade candles are the perfect place to start. They’re fun to make, smell amazing, and don’t fill your home with strange chemicals. Here’s how to do it, step by step.
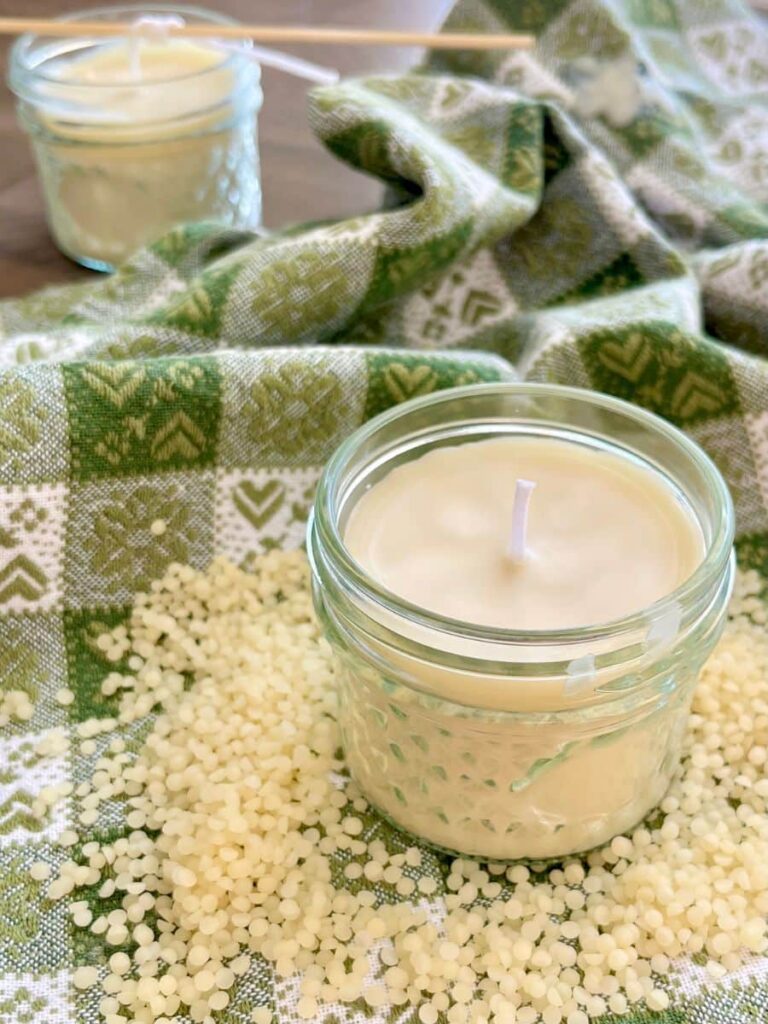
There’s something cozy about turning off the lights, striking a match, and watching a soft glow fill the room. But have you ever thought about making your own candles? It’s honestly a lot easier than it looks — and once you try it, you might never go back to store-bought ones.
People have been making candles for centuries, long before fancy tools or store shelves even existed. And today, with just a few ingredients, you can make candles that look beautiful, burn clean, and smell exactly the way you want them to.
Why make your own candles
Making candles at home isn’t just a crafty project, it’s relaxing, satisfying, and surprisingly practical. Here’s why it’s worth trying:
- You skip the toxins
Many store-bought candles are made with paraffin, a petroleum by-product that can release things you really don’t want to breathe. When you use natural waxes like beeswax or coconut oil, you can enjoy your candle without worrying about what’s in the air. - You get to customise everything
Pick the container, the size, the scent, the color, even the vibe! You can add dried flowers, cinnamon sticks, or essential oils to make them uniquely yours. - They’re budget-friendly
Good candles are expensive, but the homemade kind cost a fraction of the price. Plus, you can reuse old jars, teacups, or any heat-safe container you already have. - It’s actually fun
Watching wax melt and harden again is weirdly satisfying, I promise you. You can experiment with different shapes and decorations each time. - They make great gifts
A homemade candle in a cute jar with a little tag? That’s a thoughtful, personal gift for anyone who loves simple, handmade things.
Why beeswax is the best wax

If you want your candles to be natural and long-lasting, go for 100% pure beeswax. It’s been used forever, and for good reason:
- It burns clean: no black smoke or chemical smell.
- It lasts longer than paraffin or soy wax.
- It’s completely natural and safe to burn indoors.
- It has a gentle honey scent all on its own.
Some people say beeswax candles release negative ions that help clean the air. There’s not much solid science on that, but what’s certain is that they don’t pollute the air like paraffin candles do, and that’s already a win.
One tip: Make sure the label says 100% pure beeswax. Some cheaper versions are mixed with paraffin.
Recipe for homemade beeswax candles
Ingredients
- 14 oz (about 400 g) pure beeswax
- 4 oz (about 110 g ) coconut oil
Supplies
- Glass jars or small containers
- Cotton wicks
- A couple of sticks or pencils to hold the wick straight
- A heat-safe bowl
- A pot for the water bath
- A spoon
Instructions
1) Combine the beeswax and coconut oil in a bowl and melt them over a double boiler (a bowl placed over simmering water). Chop the beeswax into small pieces so it melts faster.


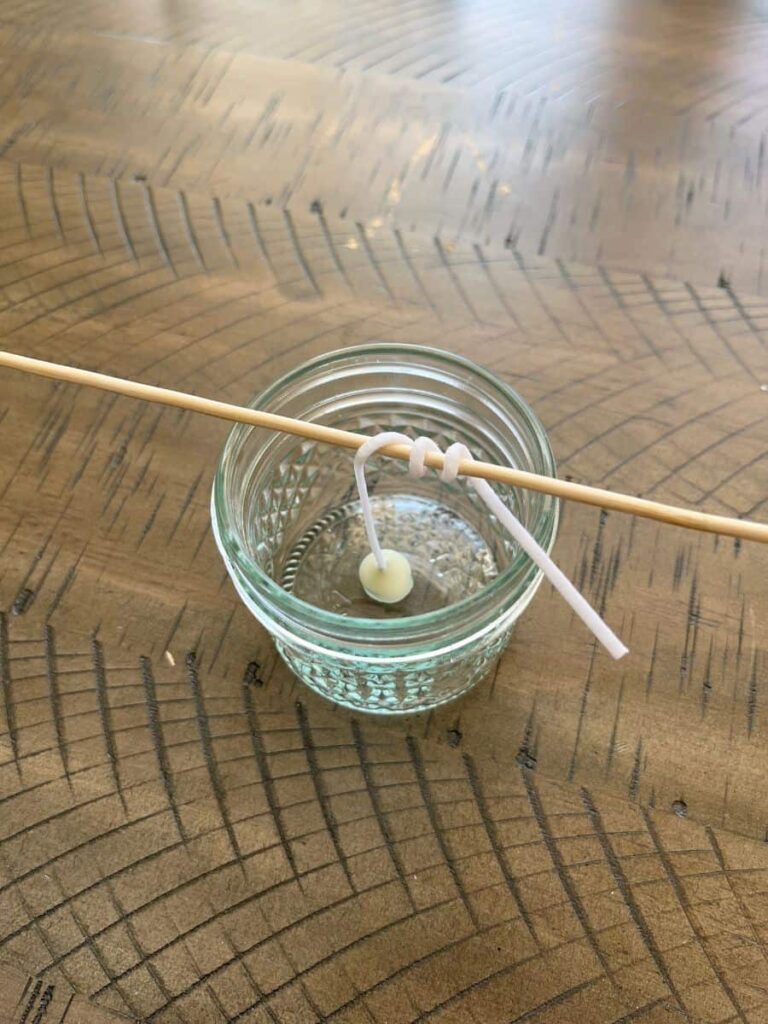
2) While the wax melts, get your jars ready. Dip the bottom of each wick into the melted wax and press it to the bottom of the jar. Once it cools, it’ll stick firmly in place.
3) Wrap the top of the wick around a stick or pencil and rest it across the top of the jar to keep the wick straight.


4) Pour the melted wax into your jars slowly, then let them cool completely. Once solid, trim the wick to about ¼ inch (5 mm).
5) Let your candles sit for at least 24 hours before lighting them — this helps the wax harden evenly.


Tips
- If the wax starts to thicken while you’re working, just warm it again.
- Reuse containers you already have: old jam jars, mugs, or teacups all work great.
- Use dedicated tools for candle-making. Beeswax sticks to everything and can be hard to clean off.
- To clean up, place your tools in a warm oven (around 210°F / 100°C) and wipe off the melted wax with a paper towel before it hardens again.
- Pour the wax slowly to prevent cracks on the surface.
How to add natural fragrance
Beeswax and coconut oil smell lovely on their own, but if you’d like to add a hint of scent, there are two ways to do it.
1. With herbs and spices
Add fresh rosemary, lavender, cinnamon sticks, or cloves to the wax while it melts. Once it’s fully melted, strain them out before pouring the wax into containers.
2. With essential oils
Add 15-20 drops of essential oil for every 4 oz (about 110 gr) of wax. Some great options:
- Lavender: calm and floral
- Sweet orange: fresh and uplifting
- Peppermint: crisp and cool
- Eucalyptus: clean and refreshing
Decorating ideas
Want your candles to look as pretty as they smell? Try these ideas:
- Dried flowers: simple, elegant, and timeless.
- Whole spices: star anise, cloves, or cinnamon give your candles a rustic, warm look.
- Labels and ribbons: if you’re gifting your candles, hand-written tags make them extra special.
Just remember not to let decorative pieces touch the wick or flame.
FAQ
Why add coconut oil?
It helps beeswax burn more evenly and last longer.
How should I store them?
Keep them in a cool, dry place away from sunlight. If they get dusty, just wipe them gently with a cloth.
How long do they last?
Beeswax keeps practically forever. The only ingredient that can spoil is the coconut oil, but your candles will stay good for at least a year or two.
Why does my candle smoke?
The wick is probably too long. Trim it to about ¼ inch before lighting.
How can I color candles naturally?
Try beet powder for pink, turmeric for yellow, or cinnamon for a soft brown. Strain the wax before pouring to avoid clumps.
Final thoughts
Homemade candles are one of those simple projects that make you wonder why you didn’t start sooner. With just a few ingredients, you can create something beautiful, practical, and entirely your own.
They make your home feel warm and calm, and they make the sweetest handmade gifts too.
So grab some wax, melt it down, and try it yourself. Once you light your first candle, you’ll see what I mean!